Thursday, April 26, 2012

DIY ice truck killer victim’s nails

I would like to pay homage to Dexter and his brother Brian Moser / Rudy Cooper / The Ice Truck Killer. Brian is badass; as a child he witnesses the brutal amputation of his mother. He then develops this bat-shit-crazyfetish for amputees, bangs his half-sister and goes on a legendary killing spree in Dexter’s territory. At the end of the most recent episode, Brian shows up in Dexters warped reality; it seems as though Brian will be taking the place of Dexter’s father as the dark-passenger-shepherd.


anyway, meet Brian.
Meet Brian’s handy work.
Here is everything you will need to achieve the Ice Truck Killer victim’s nails. I traded out the hacksaw for glitter. Put two coats of color, one coat of clear (then sprinkle glitter on top) then one more coat of clear.
I cant help being so awesome
toes too!
I skipped class to paint my nails ala Dexter, hula hoop in my living room and eat pasta in my underwear. i dont even care if it’s real. – even cowgirls get the blues.

harem pants

Here is a pair of my favorite harem pants in the making. As you can see, it really is a simple process. You just need a bunch of fabric and some patience. The waist is 40″ and it is 84″ wide at the feet. The bottom of the first panel at the waist is 60″… You can see how it tapers nicely.


Ta da!


DIY Bindi Face

I have gone on this rampage of gluing things to my face. If anyone is interested in being as cool as I think I am, I would recommend picking up some DUO Eyelash glue and a bunch of packets of scrap-booking gemstones from your nearest craft store. I dot a miniscule amount of the glue directly on my face, and then I stick the bindi to the glue. This is much easier than trying to put the glue on a little-itty-bitty crystal and then trying to maneuver it to your face. Tip- you want it near your eye, not in your eye. Also, let the glue dry for at least ten seconds before sticking the bindi on.

intergalactic booty shorts and top

1. obtain intergalactic fabric
2. cut a pair of your favorite booty shorts along the seams to use as a template
3. place the remnants of your old booty shorts on shiny fabric and trace
4. cut out shapes
5. pin and sew
6. look awesome


The matching top is also super simple to make. cut out a triangle that covers your bust, then cut out a little 'C' at the top for your neckline!! 


mini fanny pockets.

My name is Katie and I love fanny packs. They are just so darn practical! You can carry around all sorts of stuff without having your hands restricted. Genius. Anyway, I made these little pockets the other day, they are super easy. Here ya go.

Here are the finished pockets on a belt that I made. I literally just layered pieces of fabric and sewed a quick seam. 


I really like the raw edges, it makes it look much more organic and fun. I suppose I will start to play around a bit with trimming and such. If you have the little mechanism to put snaps on, go for it. If not, just use velcro.

Ta da!


DIY hello kitty bow

Shave side of head

add bow


Crystal Castles


My buddies over at  Elektrick AVE Productions and Viral Sound commissioned me to sew some slip covers for these awesome crystal art installations. They are placed on stage and projected on with 3D mapping. We finished the project like ten minutes before they had to be brought over to Rock and Roll Resort, so I am not sure how much time the VJ had to play with the projections…but it looked awesome for the first go!! Here are some pictures of the process and a video from the festival, with the crystals in action. 
To make the structures themselves, you only need some 1/2" PVC tubing, joints and a hacksaw. 
Make sure you use super stretchy fabric for the slip covers, and it has to be white so you can project on it!
Reinforce the top of the slipcover with a stronger piece of fabric so the point stays pointy
Sew ties on each corner to help the cover stay in place
I used velcro to keep them closed, but if I could do it again I would use ties!

Ta da!


Here they are, in action! 

DIY little animal phone case

Today we will be making the cutest little iphone case on the whole planet!

All you need is a cheap plastic case, like this one:
Available here

...and some faux fur and hot glue!

Use the hot glue (sparingly) and cover the whole case in faux fur. Trim excess fur with an x-acto knife!

Tuesday, February 14, 2012

Super Sexy Braided T-Shirt


Hello Friends! Today we making a simple 'braided' T shirt, you don't even need a sewing machine for this project.

What you need:
Form fitting t-shirt
Sharp fabric scissors
Fabric marker
Ruler

1. Lay your t-shirt on a flat surface. Grab your ruler and your fabric marker and draw out your pattern. Our lines are 3/4" wide and 3" long (so 6" long in total, because the shirt is folded in half)


2. Grab you scissors and cut along the horizontal lines! I only cut the top line 1" in and the 2nd line 2" in, this makes it look like the pattern tapers towards the top of the rib cage.


4. Stretch out each of the strips of fabric, this makes the shirt fall into place nicely when you put it on.


5. Turn the shirt right-side-out and shake it out. Grab the second strip and tuck it behind and through the space over the 1st strip. Take the 3rd strip and tuck it behind and through the space over the 2nd strip. Repeat until you get down to the bottom. This is difficult to explain, but check out the photo here and figure it out! I have faith in you.


This is the 2nd strip woven behind the 1st strip. Now we will grab the 3rd and put it through the 2nd.


6. Once you get to the Bottom, you can either tie the last two pieces in a knot or sew it like I did! 


Thanks Joshua for helping with this extra special Valentine's Day project :)


Monday, February 13, 2012

Pretty Feather Earrings

Howdy Folks! Today we are making basic feather earrings. They look like hair extensions when worn with longer hair styles, they are super easy to make and I always get a ton of compliments.

Here is the finished product so you can see what you are getting yourself in to:


Supplies:
2 Pairs of small needle nose pliers
Earrings (the part that you put through your ear)  
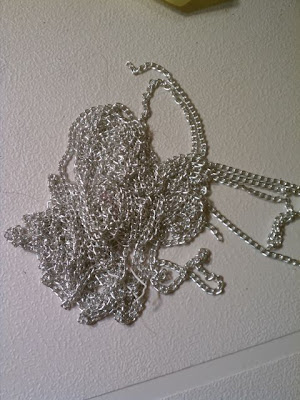
Chain-link
Jump Rings (O shaped rings)
End-Caps
Feathers

Earrings
Chain-Link
End-Caps
Jump-rings

1. Pick out four  solid color feathers and four smaller feathers to layer. You can choose to use just one feather, but I like the depth and texture of two.

  2. Take your end cap and lay a pair of feathers within the two little metal prongs.


3. Use your pliers to push down the prongs one at a time to secure the end of the feathers in it's grasp. Repeat with all four pairs of feathers.


4. Cut your chain to your desired length. You can obviously choose to have as many or as few feathers as you would like.

5. Take the Jump ring and open it up using one plier in each hand. Put the ring through the top of the Jump ring and then put it through a link on the chain. Close the jump ring so the edges of the circle are smooth and meet up perfectly. Repeat with each feather. Keep them spaced evenly on the chain, with one on the top and one on the bottom!


6. Now add the earring to the top of the chain with the same method that you used for the feathers.

7.  Go nuts and make dozens of pairs to match every outfit!